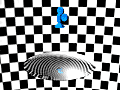
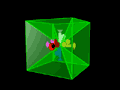
Using a reflector(mirror)/refractor(lens) and camera contained in the following 3ds max scene files,
you can directly render dome masters (circular fisheye images) without stitching.
The scene files also include shield objects to block unwanted rays.
Fisheye Reflector & Camera (max scene, 53.1 KB)
Rendered images are mirror images that are laterally
reversed. When you add a new object beteen the reflector
and the camera, don't forget to uncheck the Visible to
Camera checkbox in its Object Properties.
This is a max 4 file. Somehow, it appears that
the Material Editor of 3ds max 5 or later cannot
read them correctly. In that case, please build
a raytrace material using the same parameters manually.
Fisheye Refractor & Camera (max scene, 138.7 KB)
This is a max 4 file. Somehow, it appears that
the Material Editor of 3ds max 5 or later cannot
read them correctly. In that case, please build
a raytrace material using the same parameters manually.
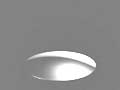
Fisheye Reflector (3ds object, 35.0 KB)
Set a camera with a FOV of 90 degrees at the position of
the Camera Position object.
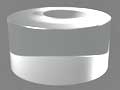
Fisheye Refractor (3ds object, 130.6 KB)
Set a camera with a FOV of 90 degrees at the position of
the Camera Position object. The refractive index should be set
to the inverse of the square root of 2 (approximately 0.707).
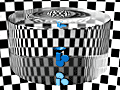
This scene file includes a group of cameras to render images of each direction
that are used in the stitching method.
Cameras for Dome Masters (max scene, 14.9 KB)
A set of five cameras (Front Camera, Top Camera,
Left Camera, Right Camera, and Back Camera)
to render source images for dome masters.
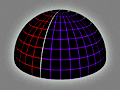
These are dome-shaped mesh objects (in the 3ds format)
to which you can apply your dome master as a texture map.
Applying a fisheye photograph, you can easily use it
as an environment map or an HDRI map. (You don't have to defish the photograph.)
-INSTRUCTIONS-
1. Unzip the downloaded file. If you also downloaded grid.jpg, put both files in the same folder.
2. Start your 3ds max.
3. Open the File menu and select Import. Choose the unzipped 3ds file.
4. Open the Material Editor and select an unused sample slot.
5. Click the Pick Material From Object icon.
6. Click the dome object with the eyedropper cursor.
7. Assign your dome master image as the self-Illumination map in the sample slot.
(Exchange grid.jpg with your dome master.)
Make sure the "Self-Illumination Color checkbox" is checked.
Low resolution model (3ds object, 60 segments, 19.8 KB)
High resolution model (3ds object, 100 segments, 56.5 KB).
Recommended.
Very high resolution model (3ds object, 200 segments,
232.8 KB)
The default texture map. jpg image (209.7 KB)
You do not necessarily need to download this
because you will replace it with your dome master.