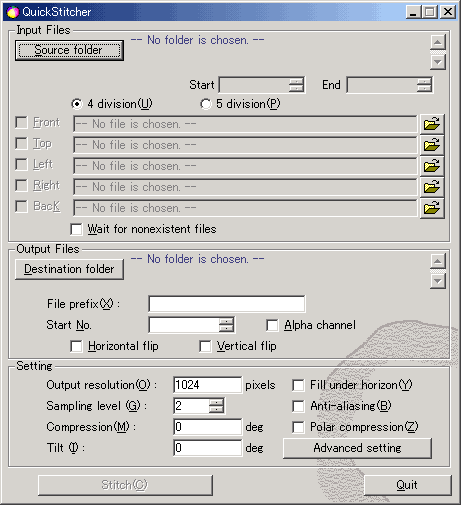
QuickSticher Initial Screen
QuickStitcher
QuickStitcher was developed as a high-quality, easy-to-use application for stitching.
QuickStitcher is a Windows application.
Only Truevision TGA (Targa) files are acceptable as source files.
The output file format is RLE-compressed 24 or 32-bit Truevision TGA.
Only if you check "Alpha channel," the output files will be saved in 32-bit.
Source images must be square (1:1 image ratio).
You can download the trial version of QuickStitcher by clicking the button below.
TriStithcer for tridivision is here.
QuickSticher Initial Screen
- HOW TO USE -
1. Prepare a single image or a series of sequential images for each direction
--front, top, left, right (in quadridivision), and back (in pentadivision).
See here for information about the division methods.
The file format must be TGA, and the image ratio must be 1:1.

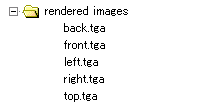
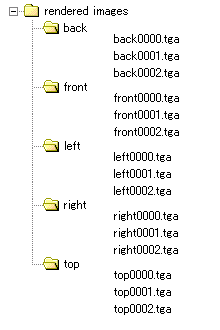
SOURCE IMAGES
Put the cursor over the image to see source images for quadridivision.
It is highly recommended to name and place input files
as described below so that QuickStitcher can set them properly.
 |
 |
| Non-sequential Files Name them front.tga, top.tga, left.tga, right.tga, and back.tga, and put in the same folder. |
Sequential Files Name them front#.tga, top#.tga, left#.tga, right#.tga, and back#.tga. ("#" is a number.) Store each set of them in the corresponding folder -front, top, left, right, and back- under the same folder. |
2. Select a source folder. In the above example,
it should be "rendered images."
You can select input files individually by clicking a button
next to the edit box where the file name is displayed.
3. Select a destination folder.
You can change an output file name by editing
a string in "File prefix" edit box.
4. Change default settings if needed. Only checkd files
in "Front," "Top," "Left," "Right," or "Back" check box
will be processed.
5. Click "Stitch" button.
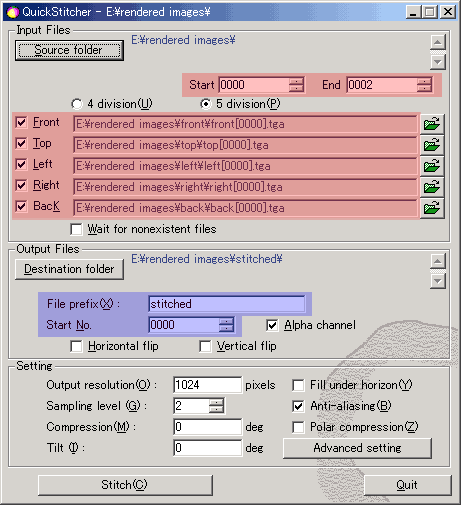
Example of Parameter Settings
The red shaded area is automatically set when a source folder is selected.
The blue shaded area is automatically set when a destination folder is selected.
You can change those settings manually later.
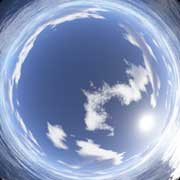
STITCHED IMAGE
The result in pentadivision. In this example, "Fill under horizon" option was on.
Put the cursor over the image to see the result in quadridivision.
Copyright 2004-2011 © PineappleWare